How to create cameras with custom values
When creating a new shot it is possible to also create a new camera for it instead of using a camera that already exists in the scene. This new camera comes with the default settings provided by Blender. This may not fit your needs though. For example you may want all the new cameras to have a lens of 30mm.
Note
Keep in mind that StoryLiner has 2 kinds of shots:
[Camera_Shot], used for every shot related to the “action” (= the animation happening in the scene)
[Storyboard_Shot], which is the type of shot created when you do a storyboard, when the Storyboard Layout is active. Even if Storyboard Shots rely on cameras, the properties of their camera are not used. For example changing the lens value has no impact on this kind of shots.
Custom values for cameras are, most of the time, required because the project you are working on has its own specificities. That’s why the Camera Template feature belongs to the [Project_Settings].
- See also:
Project Settings to configure and enable the Project Settings.
Project Settings Properties for details on the Project Settings properties.
The principle to set up template cameras is this:
One or several cameras are placed in a Blender file and are configured to reflect the needs of the project. Then, in the scene(s) where you want to create new shots with a camera based on one of the templates, define a Project Settings configuration and enable it. In this configuration, reference the Blender file containing the camera templates. When adding new shots to those scenes, you can then specify which camera data template they will base their new camera on. The specified camera data will then be copied from the referenced file to the working scene.
Creating a set of camera templates in a Blender file
The steps to create this file are:
Create a new Blender file
Remove all the objects it may contain, such as the cube, light and camera
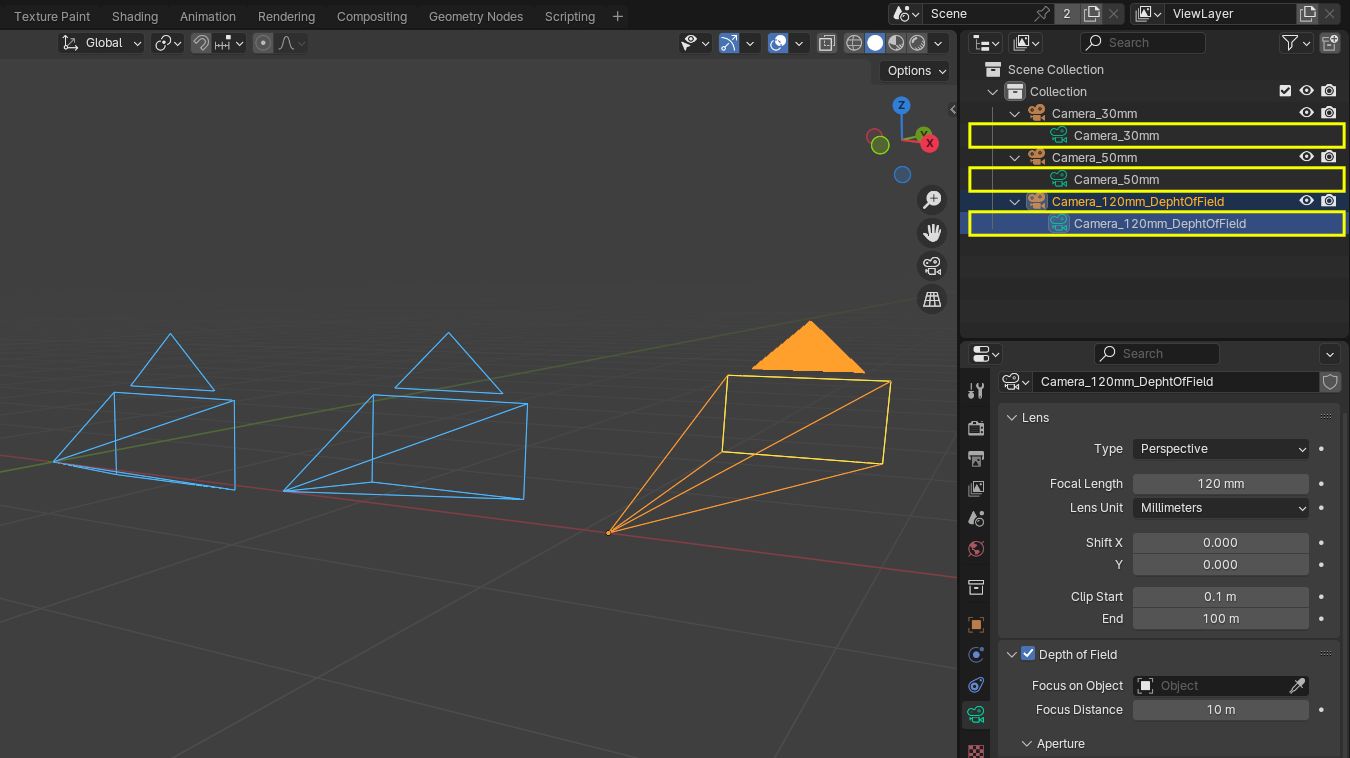
Create one or more new cameras
Change the camera data settings to match your needs: lens value and units, sensor…
Give a suitable name to the camera data entities. That’s the names that will appear later on in the Add New Shot dialog box.
Save the file on disk. Ideally it should be in a sub-folder of your project
Note
Following points are not important for the template:
The file name, scene names and camera object names have no restrictions
The file can contain several scenes
Cameras can be located or oriented at your will
Referencing the camera templates file
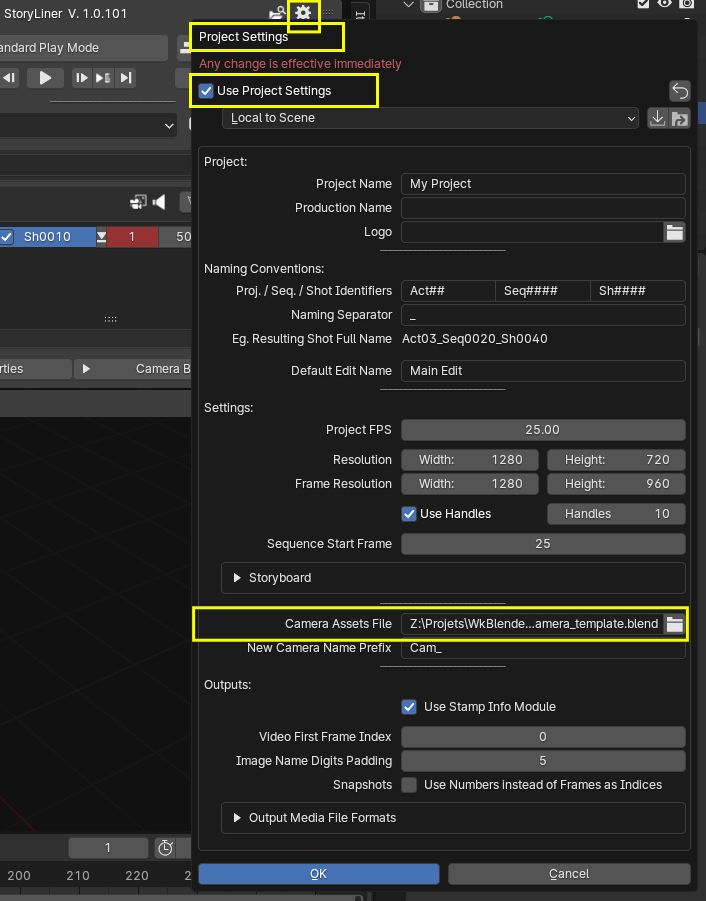
Open the Project Settings panel
Check the “Use Project Settings” checkbox
In the field “Camera Assets File”, click on the button with a folder icon
A dialog box will open. Pick the camera file you just created and validate. The file path will then appear in the text field
Close the Project Settings panel
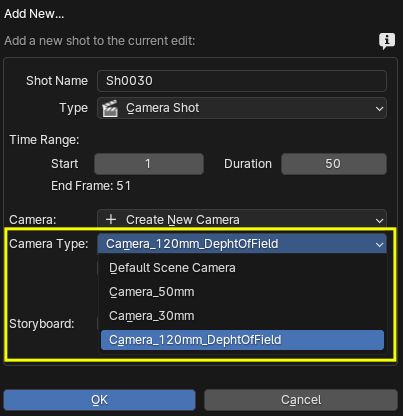
Creating shots with camera based on a camera template
Now, when a new shot is created, you can choose in the Add New Shot dialog box which camera data to use as a base for the new camera of the shot.
Important note: This will only work in the scenes with activated Project Settings