Snapshot
A [Snapshot] is an entity on its own that defines a “representative image” of the shot at a given time. It is a kind of thumbnail or image illustrating the shot.
By default shots only have one snapshot and it is set at the first frame of its time range.
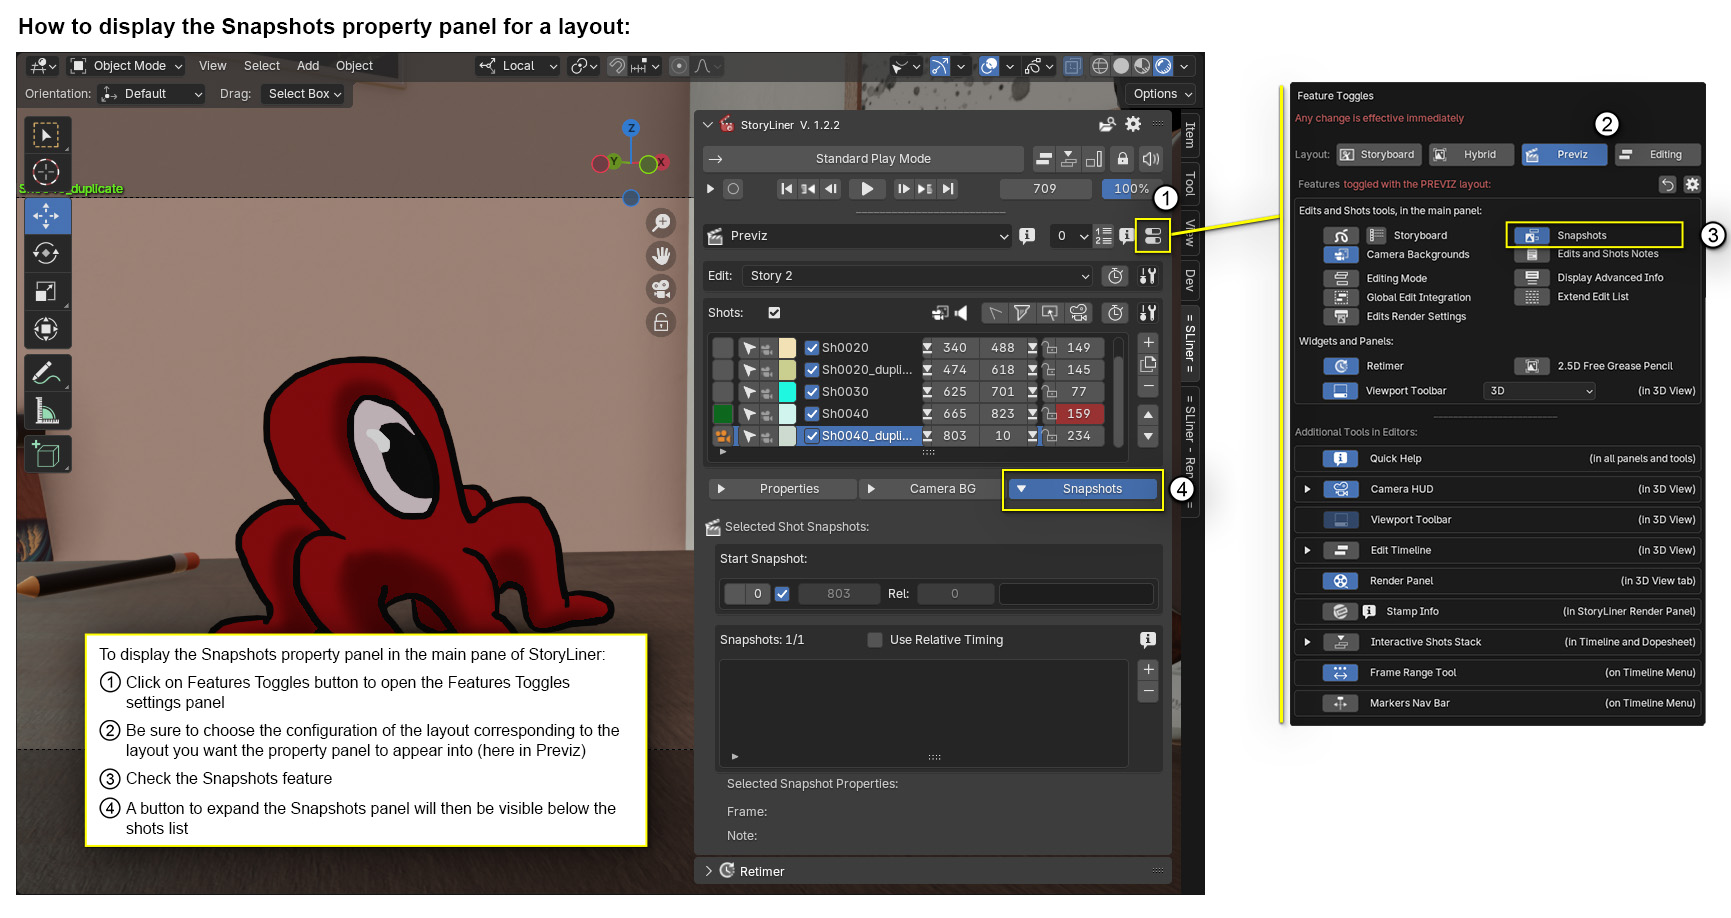
Opening the Snapshots property panel
From the main panel of StoryLiner, open the Features panel and check the “Snapshots” button for the layout(s) where you would like to have access to the Snapshots property panel.
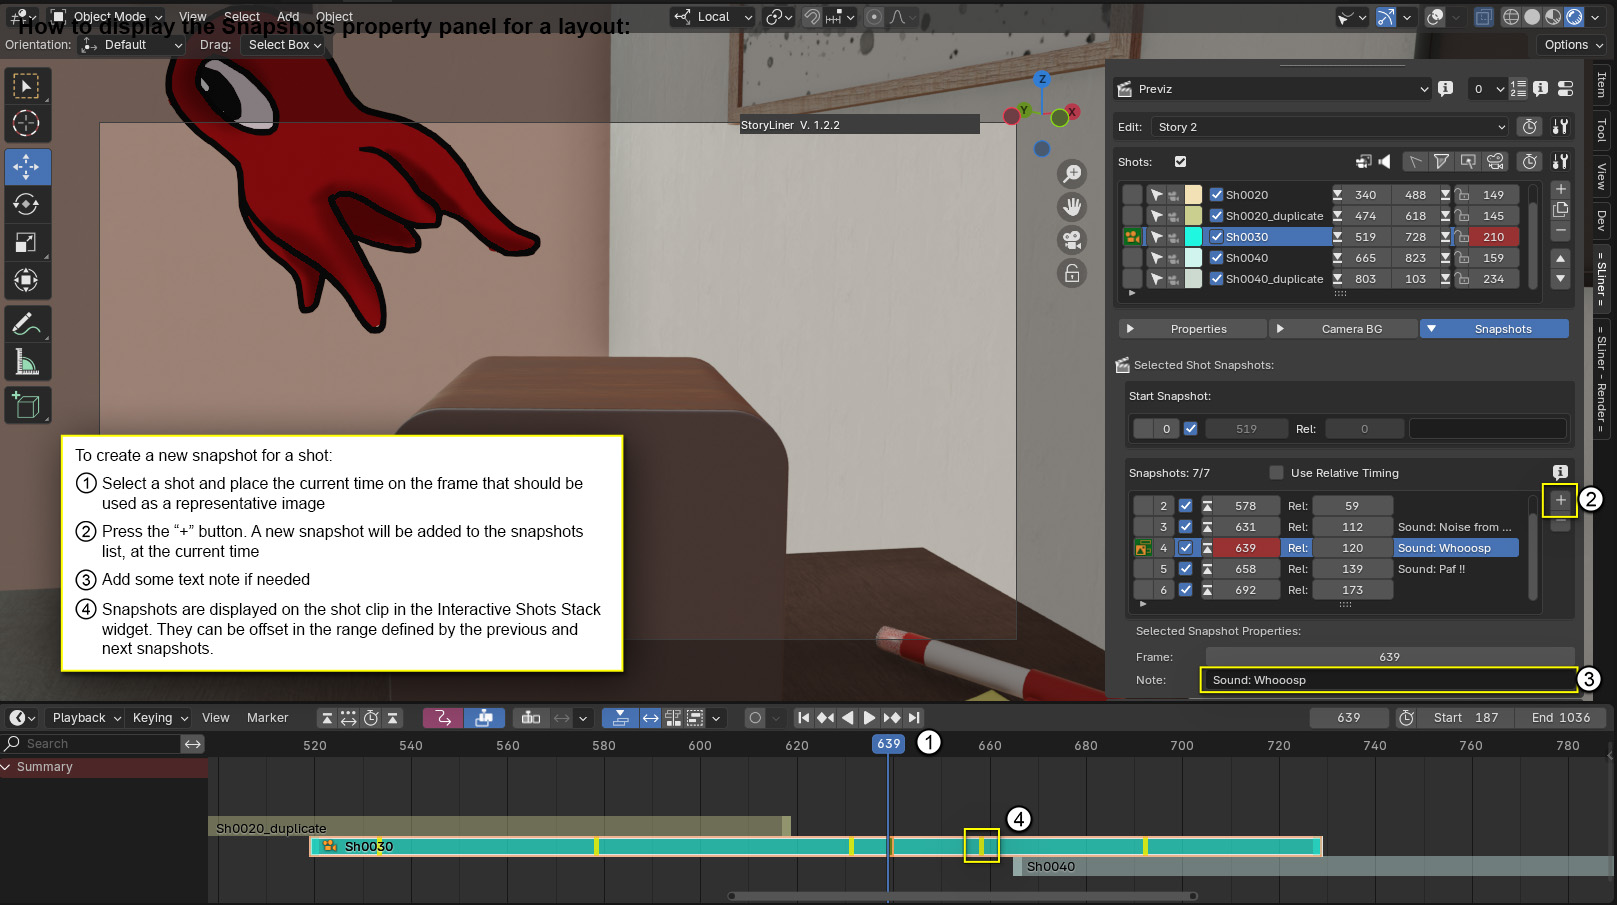
Creating a new snapshot
Snapshot Properties
Points to know about snapshots:
The set of snapshots of a given shot can be based on a scene timing or on the parent shot timing.
When the snapshots are in the shot timing, they are offset when the start time of the shot changes, so that there position in time is relative to the shot.
At the contrary, snapshots in scene time are not moved when the shot start time changes.
Snapshots can only be moved in the time range limited by the previous and next snapshots. To place one out of these range use the top and bottom arrows to change the place of the snapshot in the list of the snapshots.
Start Snapshot
Every shot has a default snapshot called the Start Snapshot. It ensures that at least a represenative image of the shot is created for the edit board.
Here are some rules related to the Start Snapshot:
The Start Snapshot is always at the start time of the shot. It has no visual representation in the Interactive Shots Stack.
A Start Snapshot can be disabled if there is at least 1 valid additional snapshot for the shot.
A Start Snapshot will be automatically DISABLED if there is a snapshot added at the same time as the start of the shot. This prevents 2 snapshots to be rendered at the same time.
A Start Snapshot will be automatically ENABLED if there is no valid snapshot in the additional snapshots list.
Additional snapshots
More snapshots can be created for each shot.
To create a snapshot, place the time cursor of the timeline to the time when the snapshot has to be created and press the “+” button at the right side of the snapshots list.
Notes:
There cannot be 2 snapshots at the same time;
Changing the time of a snapshot can only be done in the time range between the previous and the next snapshot;
To move a snapshot before or after another snapshot in the list, use the up and down arrow buttons at the right side of the snapshots list.
Snapshot times
According to the type of the shot owning the snapshots, the position in time of the additional snapshots can be absolute (= in the time of the scene) or relative (= in the time of the shot).
Storyboard Shot: Snapshots are relative to the shot start frame. In practice it means that when a Storyboard Shot is offset, the snapshots are offset with it. Remember that everything that happens in a Storyboard Shot is directly related to this shot time, there is no relationship to the action occuring in the scene. So having the snapshots relative to the shot ensures that the same representative images will be rendered for this shot, whenever it is placed in time.
Camera Shot: Snapshots are in the time of the scene. So when the Camera Shot is offset, all the snapshots stay at the same time in the scene. That’s because Camera Shots are shooting the action, so snapshots are set at a given time to get a specific moment of the action. This moment is then preserved, even if the shot range changes.
See Shot Type.
Rendering the snapshots
Snapshots are meant to be used in the Edit Board.
They can also be batch rendered as still images: see Snapshot Rendering.