When Blender’s Sequencer meets StoryLiner Video Tracks – Latest improvements
Video Tracks is an experimental feature of StoryLiner V1.7 (Studio Edition) aiming at improving the user experience with the Sequencer editor of Blender and extending the editing capabilities of StoryLiner.
This page presents the latest changes to this module and explains how to get started. To better understand the tool and the philosophy behind its workflow, read the Video Tracks documentation page.
Important notes
- This feature is for Blender 5.2 and 5.3 (currently in beta).
- I’m highly looking for feedback. When you test the version, please share your thoughts and experience with me on the Spitfire Storyboards Discord – StoryLiner support channel or by sending me an e-mail.
- The feature needs to be activated from the StoryLiner Preferences panel in order to be visible in the user interface.
Latest Changes
- V 1.7.9 Alpha: The workflow and relationship with StoryLiner edits has been completely re-designed, based on users feedback. It is now more flexible and closer to what is apparently expected for the shots manipulation.
- V 1.7.8 Alpha:
- Improved documentation
- Improved documentation
Change in the workflow phylosophy
In the previous version, the workflow was based around the use of the tracks: tracks were typed and their content could be / had to be updated by calling an action that would automatically refresh their content.
In practice, this is quite blocking in many cases since the tracks (or channels, in the Blender terminology) are very flexible (too much?) and we always want to add strips of any type to them or to move some strips to other tracks.
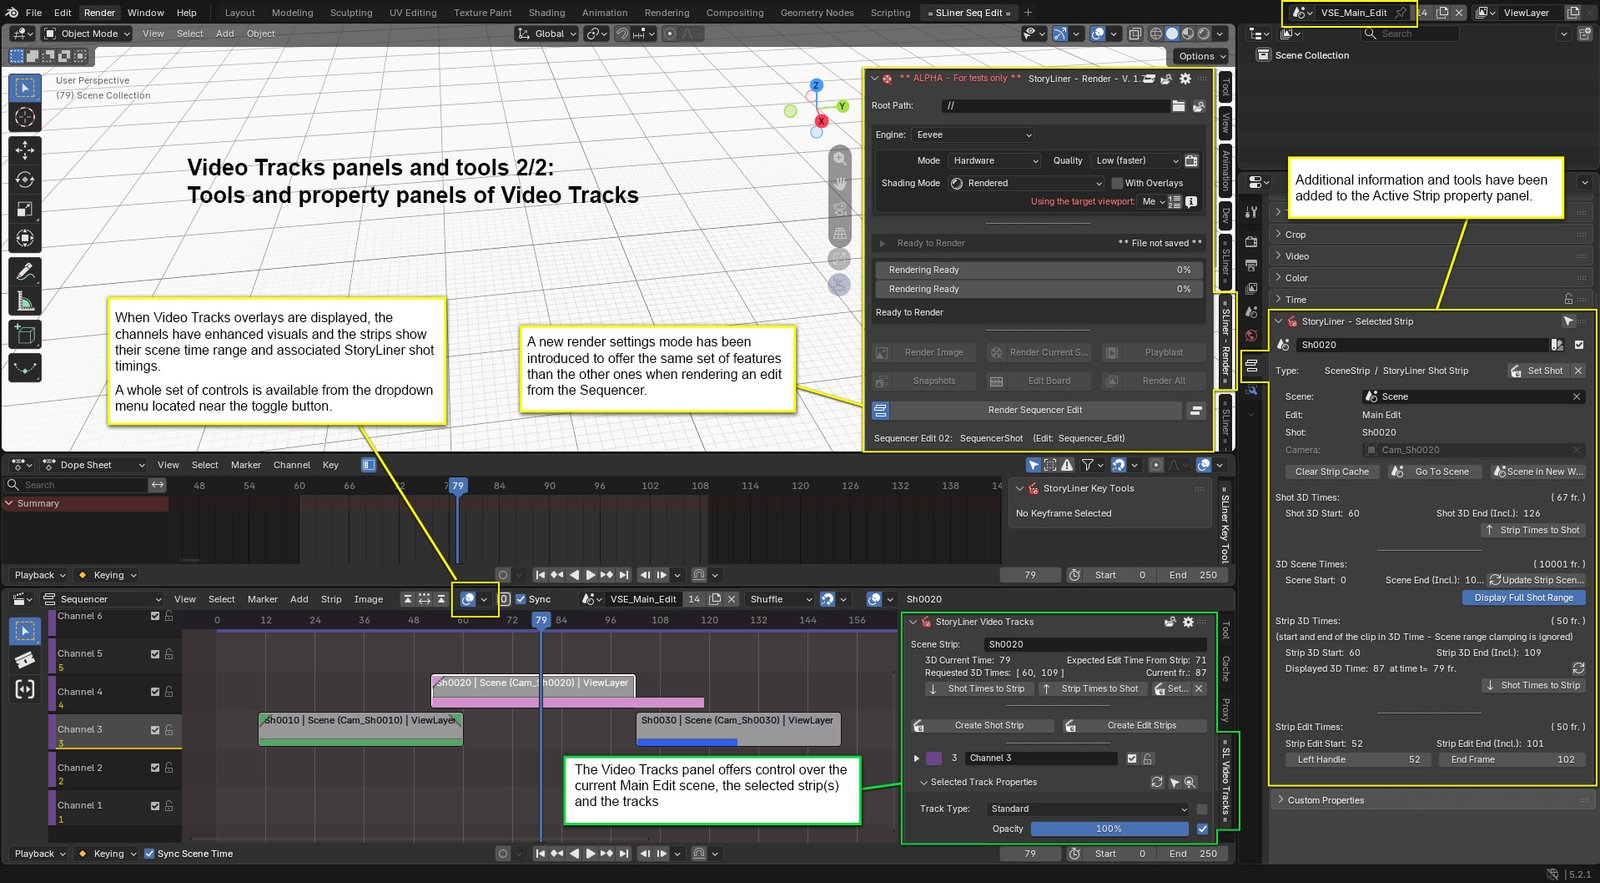
The new approach, implemented in V 1.7.12 and earlier versions, is far more strip-centric. Each Scene Strip can be associated with a shot from a scene, and some visuals drawn over the strips considerably improve the understanding we can have about their state and scene timings.
Note that all the tools to create, type and manipulate the tracks are still available.
Getting started with Video Tracks
1. Activating Video Tracks
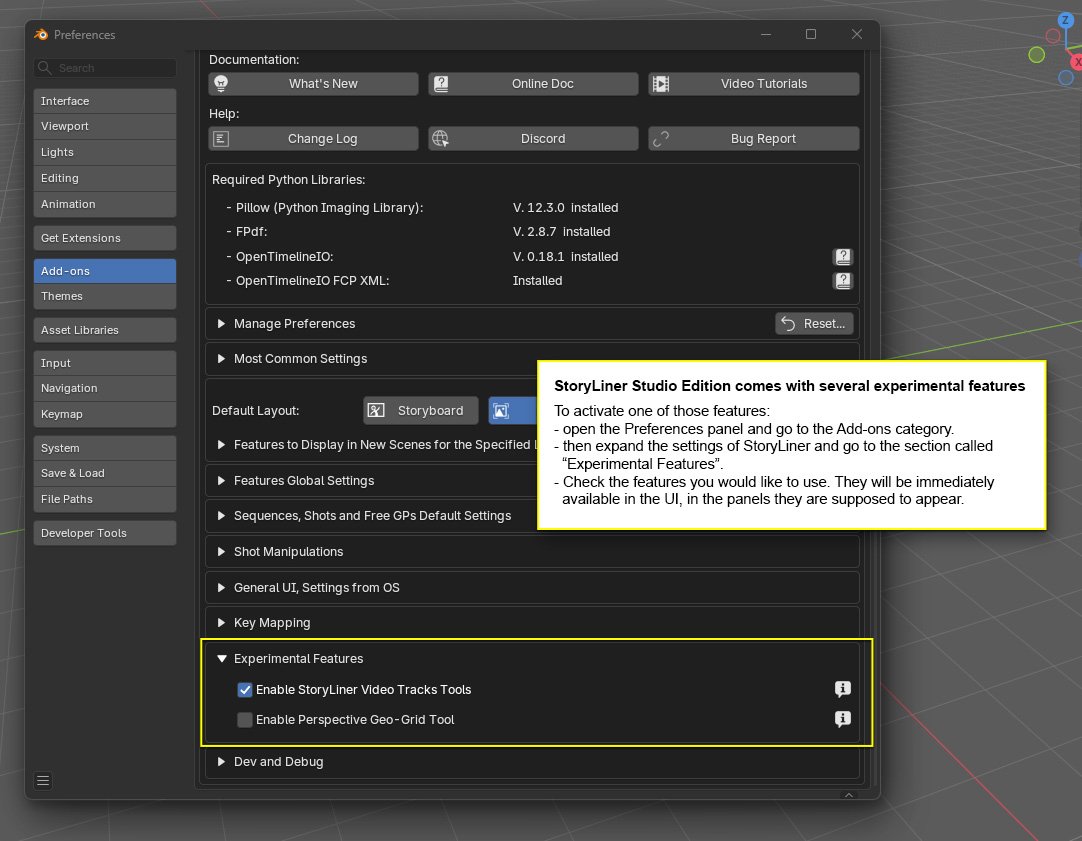
Video tracks is an experimental module. It is not officially part of the tools of StoryLiner at the moment and has to be explicitly enabled. To do so, open the Blender Preferences panel, then to the Add-ons category, and in the StoryLiner settings. Then expand the Experimental Features panel and check StoryLiner Video Tracks.
2. Creating a “sequencer edit” scene (also called Main Edit scene)
In Blender, the edit done in the Sequencer editor to create a movie often comes from a scene dedicated to that purpose. It should not have any 3D content (or at least should not use this content in the edit) otherwise some time conflict will quickly appear.
In order to differentiate 3D scenes from what we can call “global edit” scenes, StoryLiner requires the scenes dedicated to edits to be flagged as such. From them, one also has to be marked as being the current one, this in order to easily open it from the 3D scenes. This has to be done from the Video Tracks panel, in the Sequencer editor.
Video Tracks is made of 4 things:
- the definition of a current global sequence edit;
- a workspace, quit similar to the Storyboard one introduced in Blender 5;
- a set of tools to manipulate the strips and manage the relationship with the shots from the 3D scenes;
- an overlay display, on the Sequencer channels, to enhance the visuals and better understand the state of the strips.
One enabled, Video Tracks is not immediately visible in the UI of Blender because it requires a scene to be used as the edit one and the video tracks related workspace to be available in the file.
There are 2 ways to create a sequence edit scene.
a. Edit scene from the StoryLiner main panel
This way is very convenient since all the sequence edit and its environment are created in 1 click.
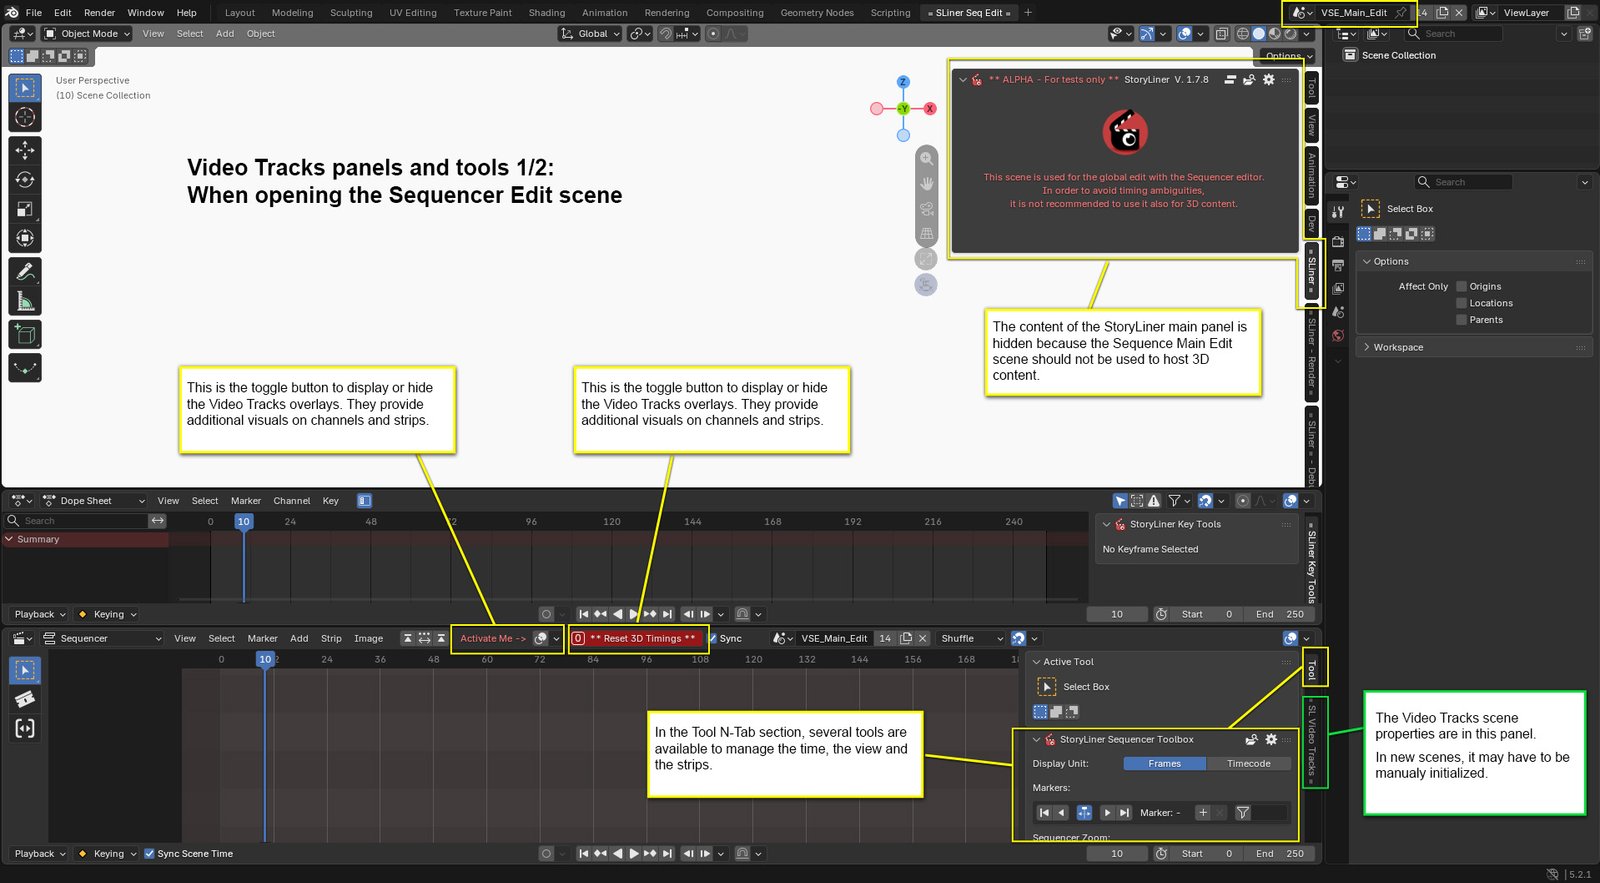
On the StoryLiner main panel, click on the button related to the Sequencer Main Edit workspace.
If no sequencer edit scene exists, then a new one is created. The StoryLiner workspace is also created and becomes the current one.
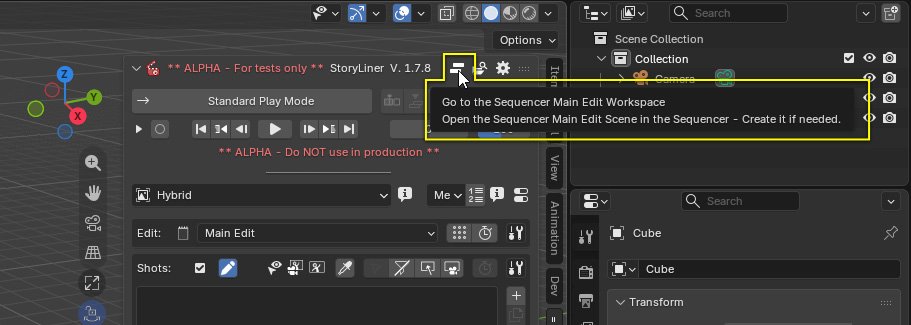
Here is how the workspace looks like:
And here is when some Scene Strips associated to shots have been created:
b. Marking a scene as Sequencer Edit scene
It is also possible to start from a completely new scene and convert it to a Sequencer Edit scene. To do so:
- Create a new scene and name it something like “Main Edit Scene” in order to easily identify it
- Load the StoryLiner Sequencer Edit dedicated workspace from the mail panel of StoryLiner
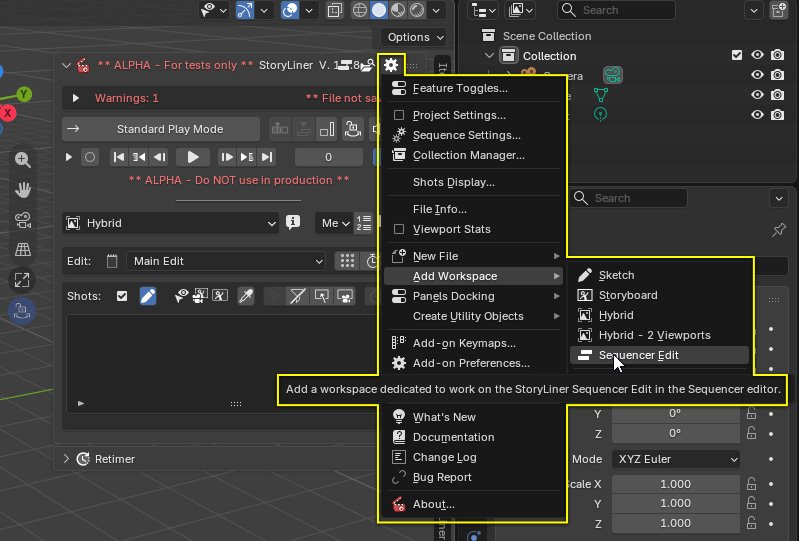
- Assign the scene to the Sequencer panel
- Then click on the button Initialize StoryLiner Video Tracks to create an instance of Video Tracks in this scene

- Now activate the Video Tracks overlays in order to have a better control over the channels. In particular you will be able to define which one is the current one and base some actions on it.

3. Associating a Scene Strip to a shot
Once that environment ready, you can start adding some strips. In our case they will be Scene Strips, in order to get the cameras and/or shots from other scenes of the current Blender file.
At this step, here is one important recommandation:
If you see that button turn red, then press it. It’s particularly important to do it before importing a time range from a scene to a Scene Strip.
This action ensure that the source scene has a time range going from 0 to… a very high value. It will save you a lot of troubles, since Scene Strips are based on that scene time range and if those times had to change it will completely break the strips associated to that scene.

Now you can create a new Scene Strip, either the usual way or by associating it to a shot from a 3D scene.
Note that when the times of a shot change, the times of the strip itself do NOT change. You have to manually update it, either from shot to strip or strip to shot, and this only if you think that’s relevant. The shots times are more an indication than a hard constraint for the Sequencer Edit strips.
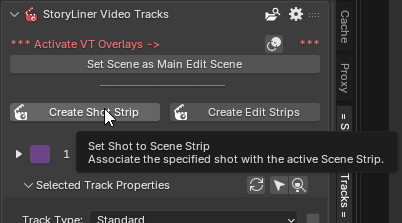
4. Rendering the sequence edit
The rendering of the content of the Sequencer editor has to be done from the StoryLiner Render panel, when the scene in the 3D View is the Sequence Main Edit scene.
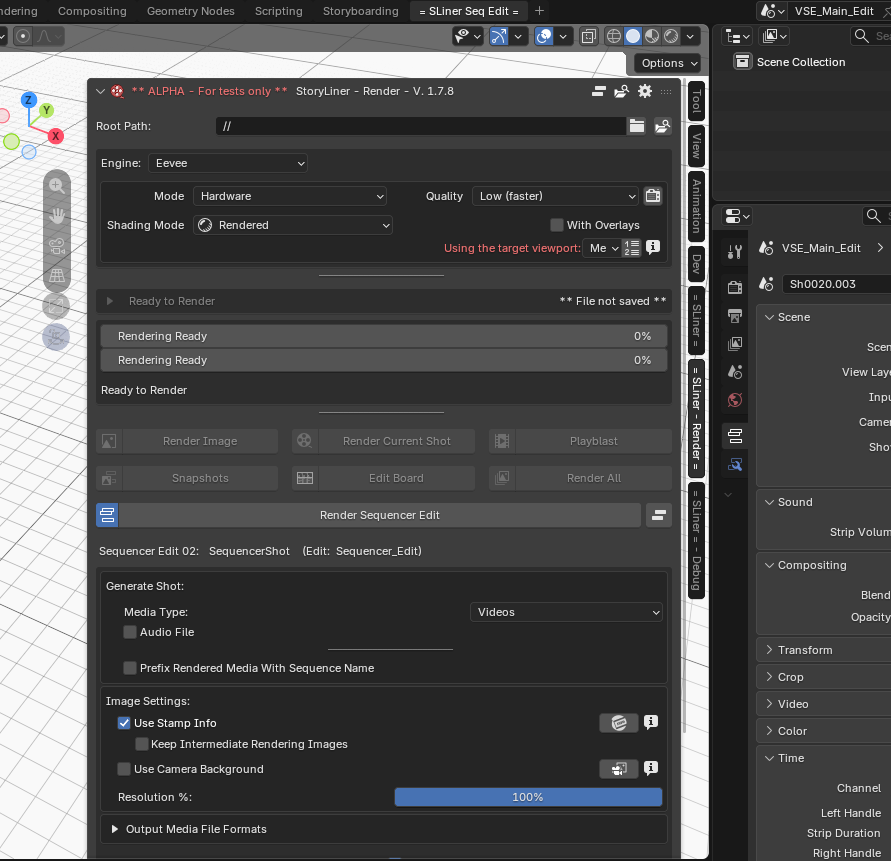
A new button, named Render Sequencer Edit, is available. It has similar settings as the Render Current Shot one and it is even possible to enable Stamp Info to get the context details printed onto the output images (note that some pieces of information may not be that relevant at the moment, this will be improved in an upcoming version).